Coding a USB DMX Adapter in JavaScript
In some of my recent work in digital experiential technology, lighting has been an intersting topic. There’s lot of tutorials on how to make some lights blink with an Arduino and some Neopixels but that kind of setup doesn’t really deliver the quality you get from professional lighting designer. Pros will be using brighter, more powerful and more durable equipment but also like to use expensive lightboard setups that are complicated to setup and don’t always play nicely with custom software. Here I’m presenting a walkthrough of how to build some dynamic lighting in code with pro-level equipment. This setup is capable of running high-performance RGB scenic lighting from a USB port.
The lighting strip I’m using here is from Environmental Lights. The specs tell us the tape has 60 diodes per meter, 3 addresses per diode (addressed GRB instead of RGB in this case) and uses 16 Watts per meter at 5V. I cut a strip 40cm long which yields 24 diodes and requires 6.4 Watts which is 1.3A at 5V. I used a DMX Decoder from the same company that can handle a range of voltages, drive 512 channels and supports daisy chaining making it easy to splice strips over a large area and not worry about voltage drops or weak signal. Bare wires go into terminal blocks so it’s simple to connect without solder. The last, and most critical, bit of kit is the DMXKing ultraDMX2 Pro. It can plug directly into USB or Ethernet for input and drive 2 DMX universes. Easy to configure and inexpensive.
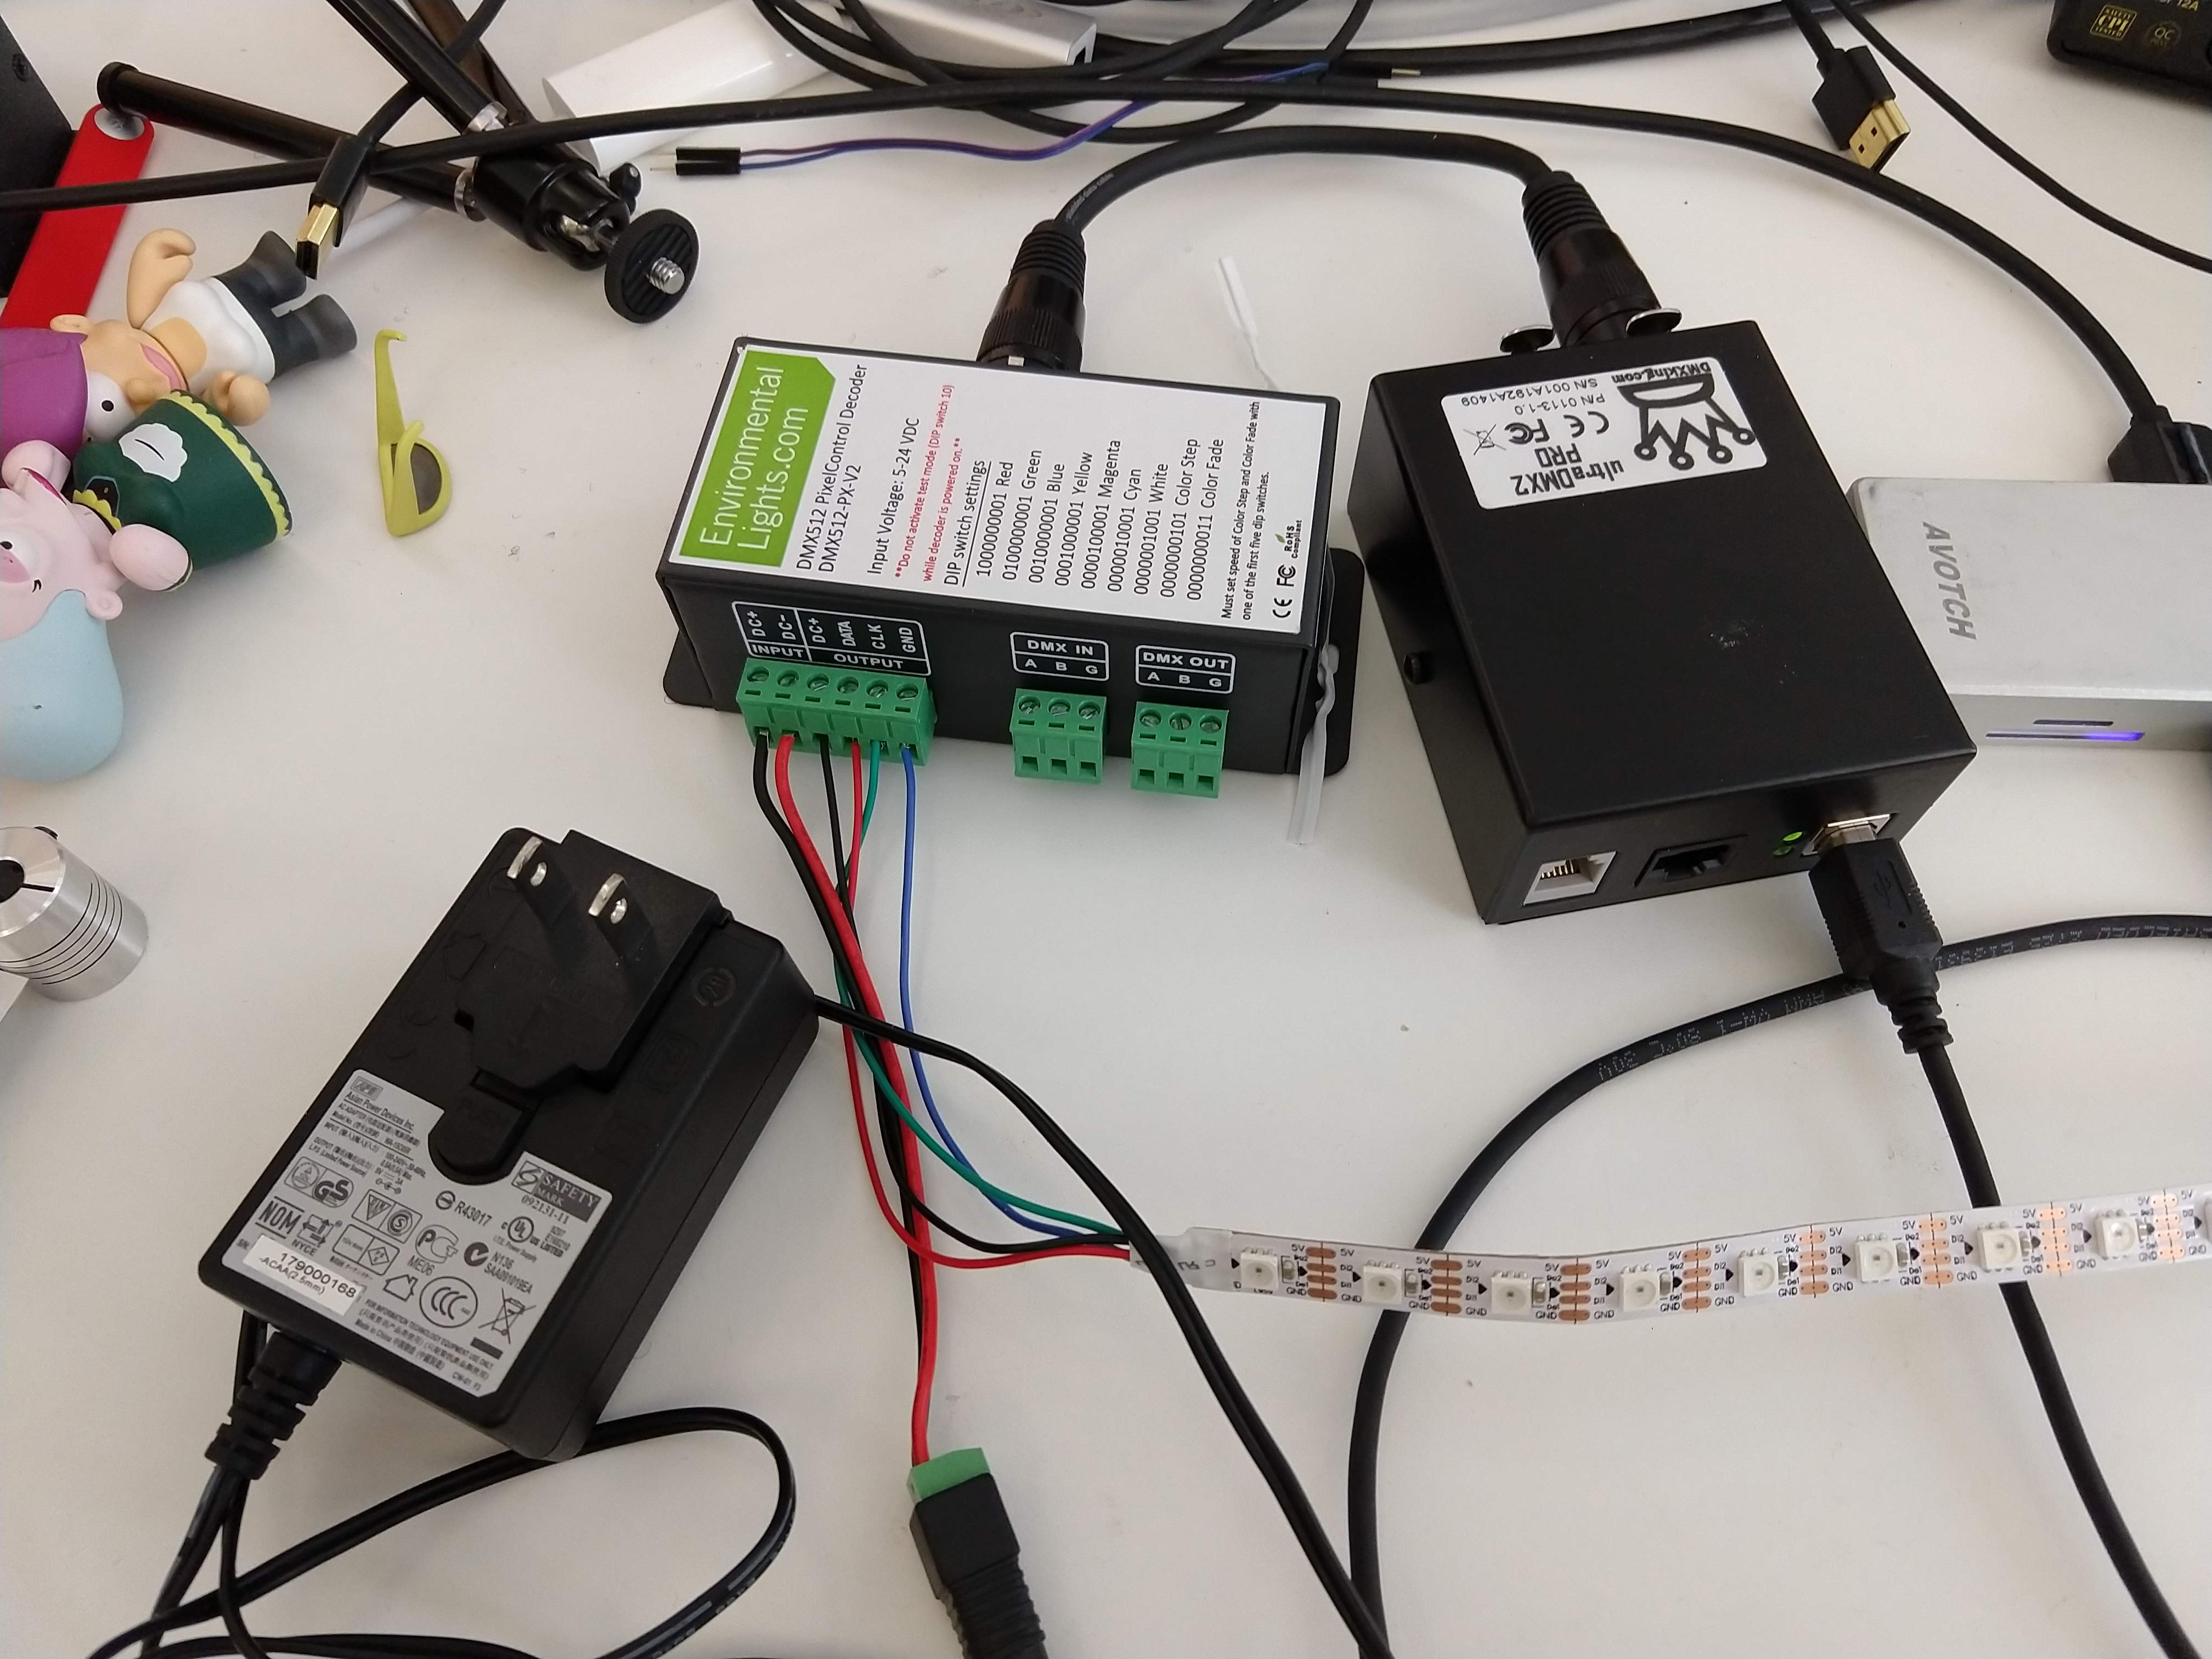
You can see that I’m using a little DC adapter as power supply and patched it to the decoder with a female barrel jack with terminal block. A bigger setup can use a bare wire power supply. Then power, ground and data for the light strip go into the appropriate ports. Then just patch the DMXKing to the decoder with a length of 3-pin XLR cable and plug the USB cable into the computer. My messy setup below uses a tiny one, but the magic here is that you can run these cables for hundreds of feet in a real venue. Now, let’s see some code.
const usbDetect = require('usb-detection');
const DMX = require('dmx');
const easing = require('easing');
These are the packages we’ll need. This dmx package is the critical one.
// Fixture details, spec here: https://www.environmentallights.com/18689-rgb-pixelcontrol-60-10-28m.html
const PIXELS_PER_METER = 60;
const OFFSET_RED = 2;
const OFFSET_GREEN = 1; // this tape is addressed GRB instead of RGB per spec
const OFFSET_BLUE = 3;
const CHANNELS_PER_PIXEL = 3;

// the length of tape cut for this demo
const TAPE_LENGTH_M = 0.4;
const PIXELS = Math.floor(PIXELS_PER_METER * TAPE_LENGTH_M);

// main object
const dmx = new DMX();

function mm_to_pixels(distanceMM) {
    return Math.round((distanceMM/1000) * PIXELS_PER_METER);
}
This is some configuration for the light strip based on the spec and how much I’ve cut. I’ve also added this utility function for mapping physical distances to pixel count. If you’re doing scenic lighting, the design is going to be based on physical dimensions irrespective of the pixel density so this can be handy.
/**
 * Scan USB ports for DMXKing device and initial a universe on port A
 */
async function getUniverse(dmx) {
    // scan for device with vendor ID and product ID for DMXKing device
    const devices = await usbDetect.find(1027, 24577);
    if (devices.length === 0) {
        throw "No DMX device found";
    }
    const dmxKingPort = devices[0].serialNumber;
    // the usbDetect lib will return a serial number of the device which
    // I've mapped to a device in the OSX format. This likely wouldn't
    // work on Windows or Linux without some massaging
    return dmx.addUniverse('mylights',
        'dmxking-ultra-dmx-pro', `/dev/tty.usbserial-${dmxKingPort}`,
        {port:'A'});
}
This block is to find the USB device and return the DMX universe of the first DMX output port. This is only going to work on Mac as-is due to the naming of the USB tty, but mapping to Windows or Linux is straightforward. I’m also hard-coding the vendor and device ID for the DMXKing device and that would be different if you’re using ENTTEC or something like that. If you have a different device, you can plug it in then lookin System Information or Device Manager to get the IDs. The extra option for port ‘A’ is because this device has two DMX outputs. I’m just running on A now, but obviously B is the other universe and it’s possible to write to them both.
That’s really the tricky part done there. The universe object has a method called update() that takes an object with addresses as keys and values from 0-255 for intensity. This tape has 3 addresses per pixel (green, red, blue) so calling update({0:255,1:255,2:255}) will set the first pixel to white. And update({0:255,3:255,6:255}) will set the first 3 pixels to green. With pixels indexed by 0, color intensity per pixel is set at the address of that pixel index times the channels per pixel plus the offset for the color you’re setting. So, for setting the redness of pixel 11, the expression is (11 * CHANNELS_PER_PIXEL) + OFFSET_RED. To blank out the strip, you’d run this function:
function blank(universe) {
    const blank = {};
    for (let i = 0; i < PIXELS * CHANNELS_PER_PIXEL) {
        blank[i] = 0;
    }
    universe.update(blank);
}
This function takes a center point and total width in millimeters, RGB color, speed in millisecond and number of blinks and will fade in and out with tapered intensity from the center point to cover the specified width.
const highlight = (universe, center, width, color, speed, blinks) => {
    const lit = {};
    const off = {};
    const base_red = color << 16;
    const base_green = (color & 0xFFFF) << 8;
    const base_blue = color & 16;
    const centerPixel = mm_to_pixels(center);
    const pixelWidth = mm_to_pixels(width);
    const maxDistance = Math.floor(pixelWidth/2);
    const steps = easing(maxDistance + 2, 'sinusoidal', {invert:true});
    for (let x = 0; x < PIXELS; x++) {
        let red = base_red;
        let blue = base_blue;
        let green = base_green;
        const distance = Math.abs(centerPixel - x);
        if (distance <= maxDistance) {
            red = Math.round(steps[distance] * 255);
            green = Math.round(steps[distance] * 255);
            blue = Math.round(steps[distance] * 255);
        }
        lit[x*CHANNELS_PER_PIXEL + OFFSET_GREEN] = green;
        lit[x*CHANNELS_PER_PIXEL + OFFSET_RED] = red;
        lit[x*CHANNELS_PER_PIXEL + OFFSET_BLUE] = blue;
        off[x*CHANNELS_PER_PIXEL + OFFSET_GREEN] = 0;
        off[x*CHANNELS_PER_PIXEL + OFFSET_BLUE] = 0;
        off[x*CHANNELS_PER_PIXEL + OFFSET_RED] = 0;
    }
    const animation = new DMX.Animation()
    for (let i = 0; i < blinks; i++) {
        animation.add(lit, speed, {options: 'inCubic'}).add(off, speed, {options: 'outCubic'});
    }
    animation.add(off, speed);
    const runPromise = util.promisify(animation.run).bind(animation);
    return runPromise(universe);
}
At this point, the sky is the limit. Using the npm easing library make it easy to programatically create washes, chases or other standard color effects. Everything else is just arithmetic. But the real power is that lighting can be truly dynamic. Responding to data, environment or user interaction. I love the fact that this is a no mess solution that doesn’t require fiddling with a GPIO or racking a giant lightboard setup. It hits the sweet spot for freedom, power and quality. The hardware cost is higher than a few Arduino or NodeMCU devices, but not going to break the bank on any professional project and will save a ton of developer hours. The only limitation is you can’t make brown light.